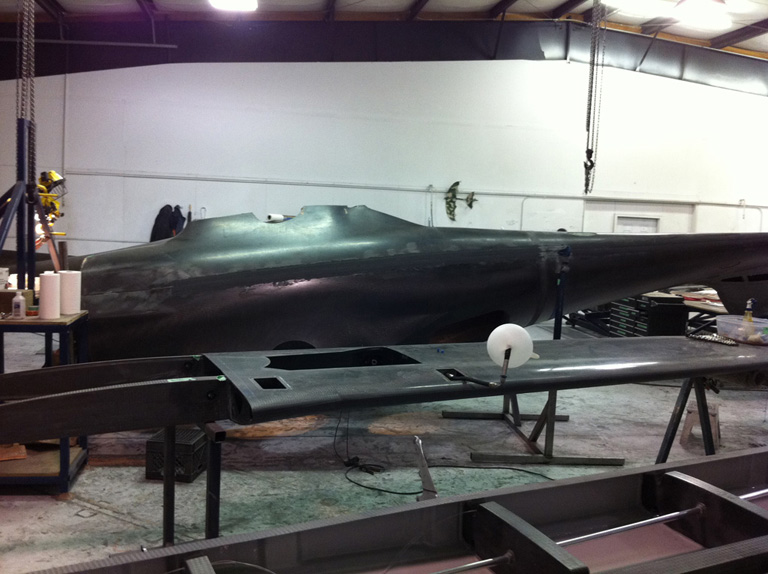
If you are like me, then you also worry about the de Haviland Comet airliners that crashed when the fuselages blew to pieces from fatigue cracks formed at the corners of their square windows. Stress always increases at sharp corners, and the square windows of the Comet had high stress-concentrations that eventually lead to fatigue cracks that lead to the airliners blowing up in flight and raining down from the sky in pieces. As well, this airliner used RIVETS to hold the window in place. The metal was of course weakened by the rivets going through it, and the edges of the metal around the rivets were additional stress-concentration points. As well, ALL metal is known to fatigue over time. As you look at the windows installation in the (pressurized) Lancair Evolution, please find all the metal, rivets, and corners you can. Those are all the danger-points to look for. (Hint: Since the airplane is carbon-fiber, with round windows, and no rivets, you will be looking for a very long time).
Ok first things first: The window comes from the factory in the right over-all shape for the airplane, but not quite prepped. It is just a big piece of 3/8" plexiglass curved to fit in the plane. (They make it by cutting a piece of plexiglass to the right shape and putting it on top of mold that has the same curvature as a Lancair fuselage. They then turn up the heat and let it melt until it droops down onto mold it is sitting on. At that point, the plexiglass is just the right shape for the plane... but not yet ready for install!
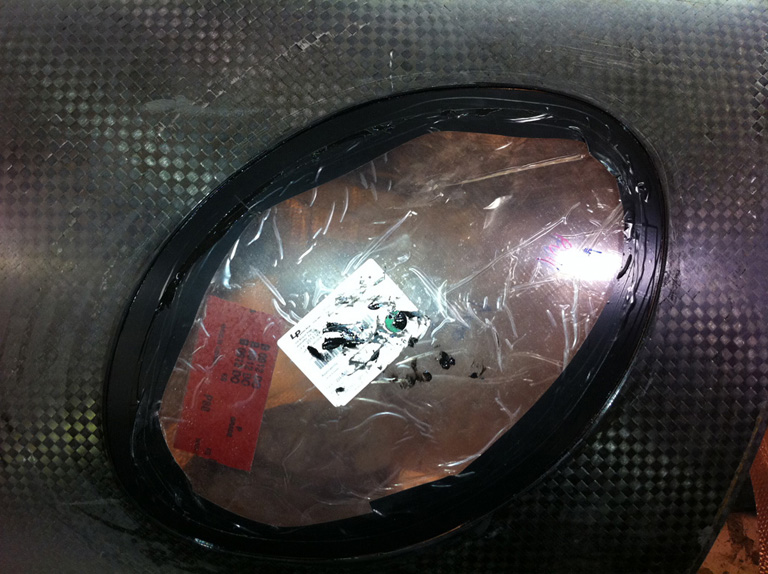
Me and the Composite-Assist guys put the window in the airplane and marked around the edge of the hole in the fuselage with a marker, right onto the plastic-wrap that is on the plexiglass. Remember, the window sits INSIDE the body of the plane, with several inches of overlap all the way around! This way, the pressurization loads simply push the window more firmly into place. Pressurization makes the window MORE safe, not less-so.
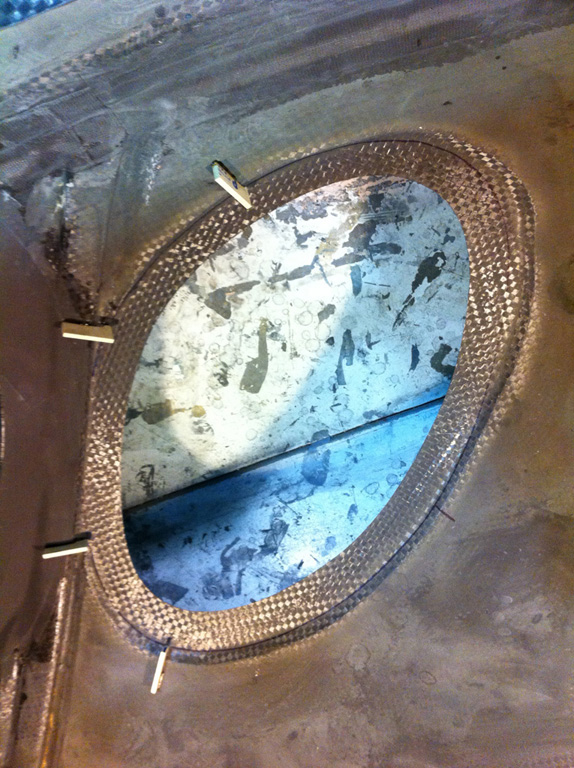
Below, you can see where the window will sit. This is the INSIDE of the fuselage. Clearly, the window will overlap past the edge of the body several inches, giving us plenty of space to bond it. Clearly, the pressurization loads will simply push the window more firmly into place, not try to take it apart!
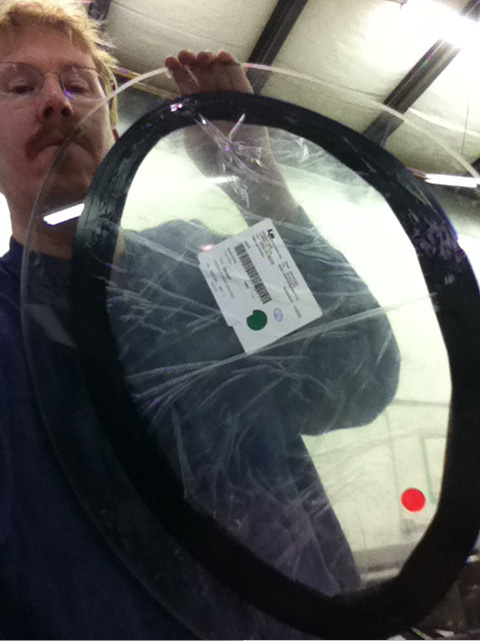
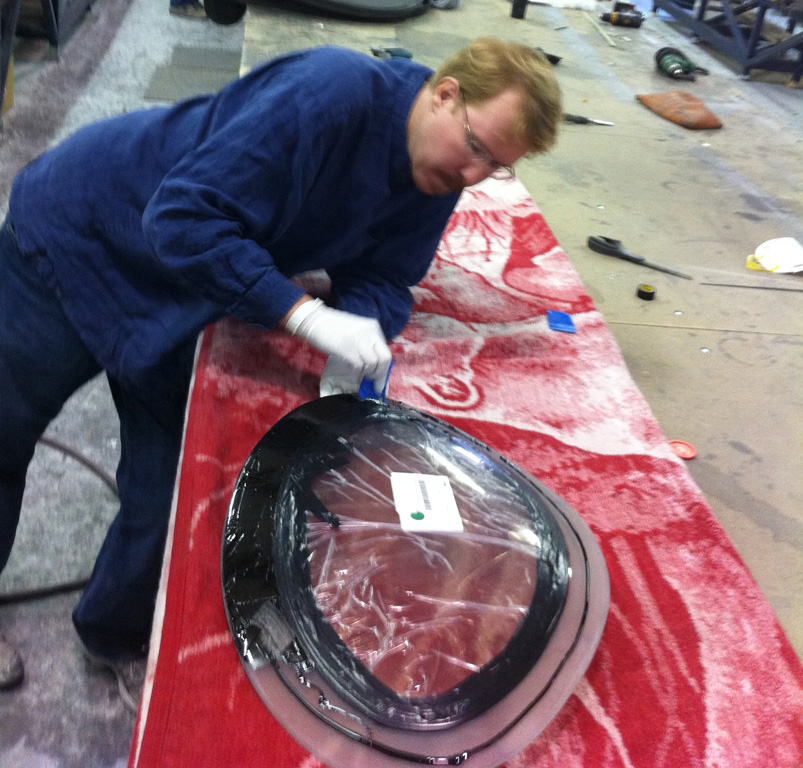
So, we position the window in the airplane with a nice overlap of the plexiglass and carbon-fiber body and mark the part of the window that is visible from the outside of the airplane with a marker. The rest of the window is overlap that will be bonded to the carbon fiber. I then put down electrical tape to mark that part of the window that is to be visible to look through, and therefore must not have a scratch on it. BUT, the few inches around the edge, outside of the electrical tape, will be sanded all to hell to give it a good bond with the sticky-glue that will hold it in! (Remember: Pressurization loads push the window OUT, thus pushing the window MORE FIRMLY into place, since the window sits INSIDE the airplane with several inches of overlap around the edge. The glue is NOT there to resist pressurization loads! The glue only holds the window in place against gravity. Pressurization loads simply press the window more firmly into place, strenghtening the bond).
Below, I use a pnuematic cutter to bevel the edges of the window. NO corners are allowed. Not even on the edges of the round window. See my note on stress-fractures above to see why.
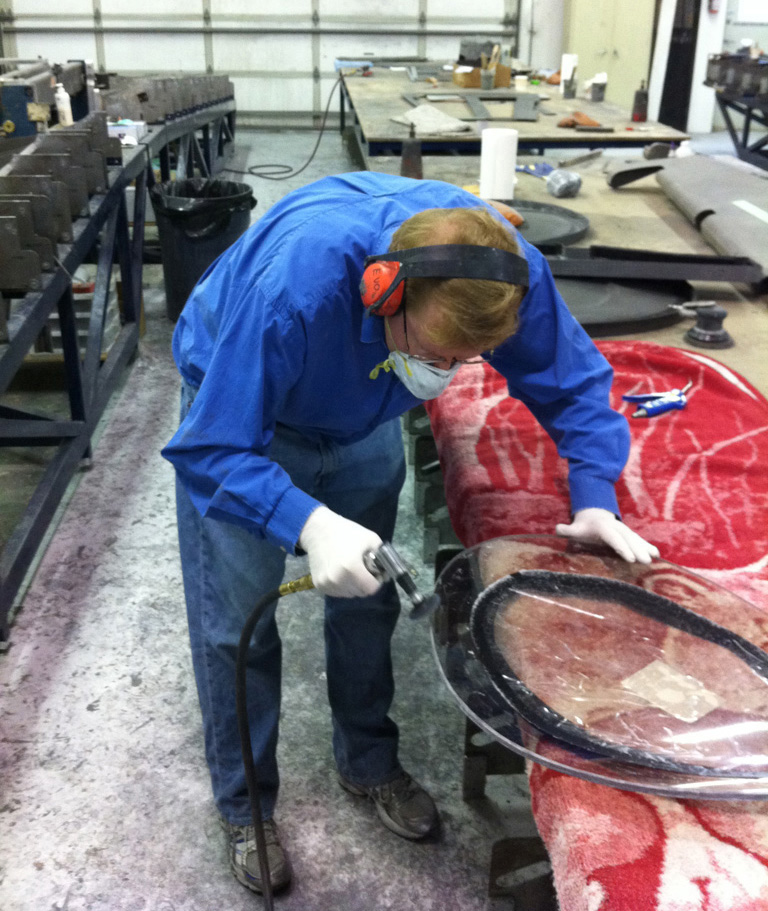
OK. I bevelled the edges of the windows. Great. Now I take a dual-action pnuematic sander and really ROUND them. By the time I am done, all the edges on all the windows are nice and ROUNDED. There is not a straight line or corner anywhere on the part.
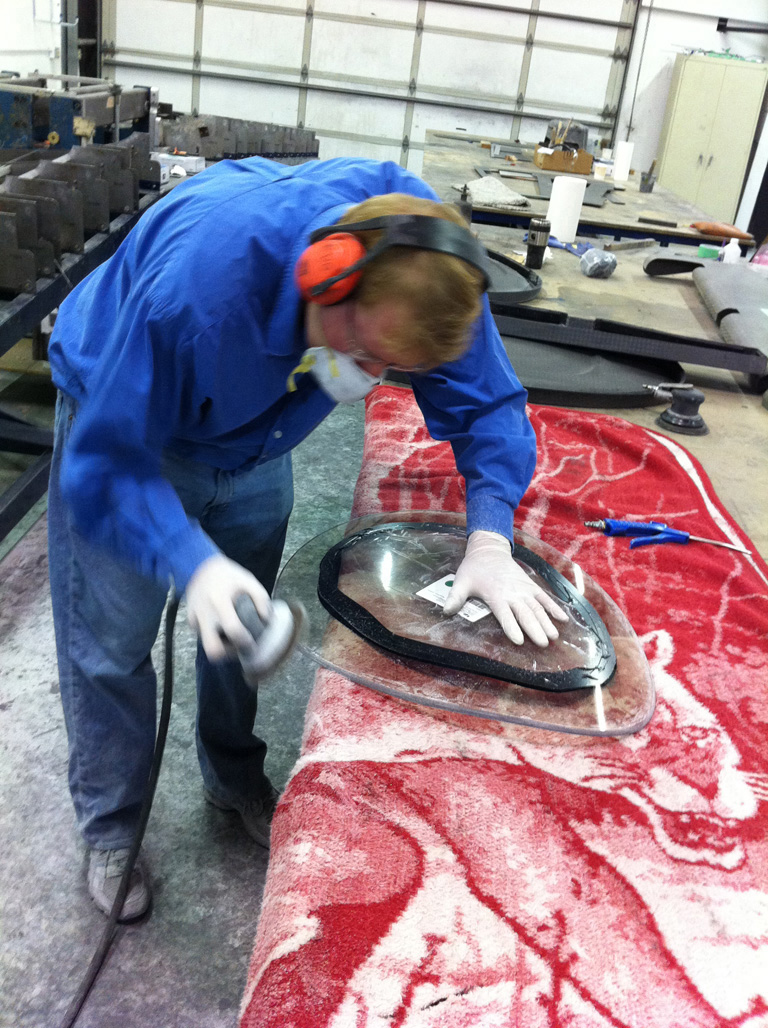
Now we SAND the part of the window that overlaps. This will make a nice rough, gritty surface for the gooey-glue to bond onto. If you look at the picture near the top of this screen that has the clear indentation for the windows, you will see that is the part of the airplane that will make contact with the part of the window that I am sanding here.
Now we have to mize the glue. We do NOT use hy-sol here.. it is not flexible enough! We want something nice and rubber and gooey and sticky and bendy. That way, the window is held in place, but as the wild temperature and pressure extremes squeeze and contract and expand the airplane and window, the window is free to 'float' a bit inside the port-hole in the fuselage, thanks the rubbery flexibility of the glue.
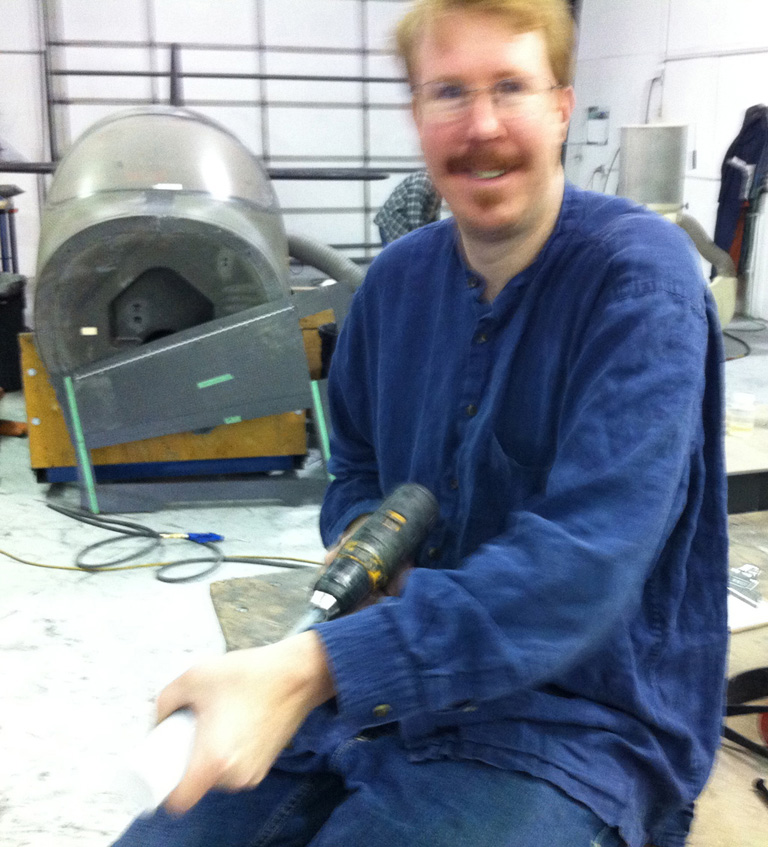
Below, I am forced to mix the glue and the catalyst to get it ready for use. This involves running the power-drill, hooked to a mixer, while pushing the power drill in and out. In and out! IN AND OUT! I am doing it so rapidly that I am literally a blurr to the camera. Wile I may have been going inand out too fast, I will say, in my defense, that I DID do it for the exact right length of time.
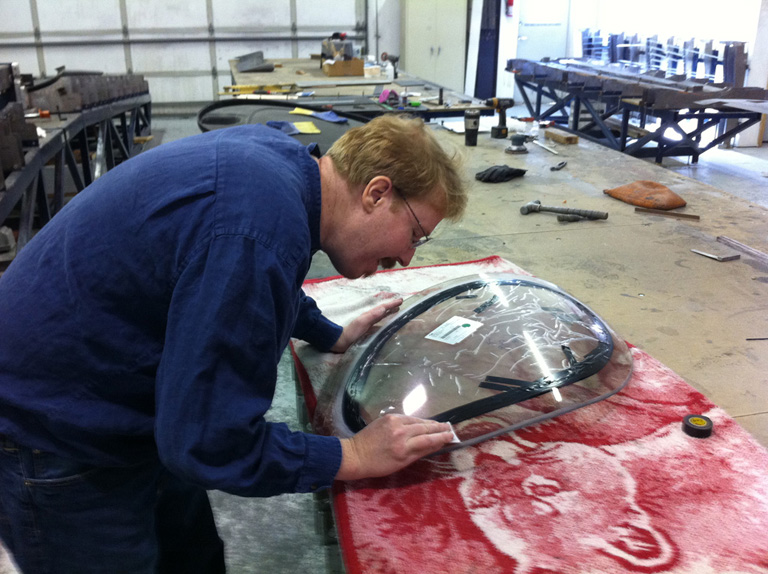
Now I put the goo on the window with a squeejee. You will note that the window is nice and DULL everywhere the glue will go: This is because I sanded it to be dull so the glue can find plenty of scratchiness to bond to. As well, the electrical tape marks the edge of the bond, and plastic-wrap protects the window. Note the very smooth, even epplication of the glue around the window edge. This will form a perfect contact-patch with the carbon-fiber wall of the fuselage!
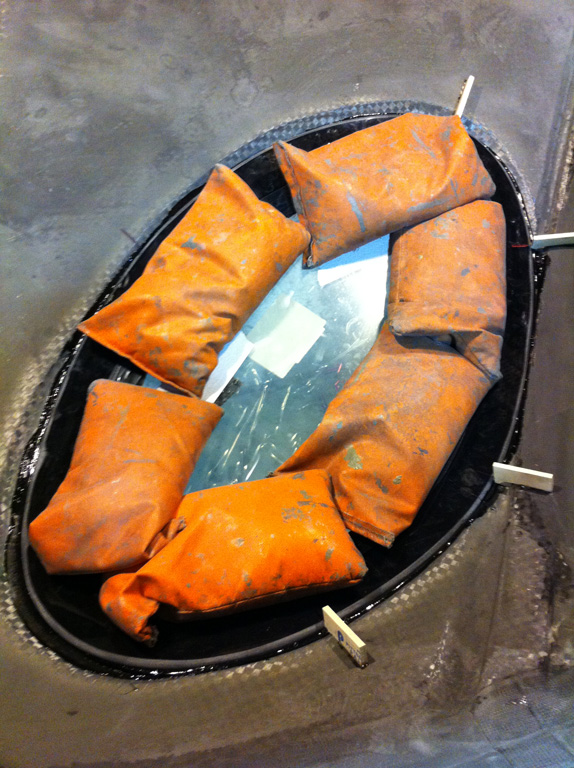
OK the airplane is on it's side so that we can DROP the window straight DOWN into place.
This has the additional benefit of testing to make sure that I will be able to do barrel-rolls in the airplane later.
So we drop the window right into place, and put some sand-bags on it to squeeze it nice and firmly down while the glue sets up.
Looking at this you can see that:
-there is no metal involved, which would fatigue over time
-the walls are carbon-fiber, with are light and strong
-window is plaxiglass, which is light and string
-there are no rivets involved, which would weaken the structure
-there are no corners, at all, of any sort, which would be stress-concentrations
-the window sits INSIDE the plane, with plenty of overlap, so pressurization will only push it MORE STRONGLY into place
-the glue holding the window is rubbery evern when set, so the window and body and expand, contract, and flex at different rates, directions, and magnitudes without putting any undue stress on the plane.
-this bond, like the entire airplane, will go from 150 degrees F on the ramp in the summer at Las Vegas to -100 degrees F over Alaska at 27,000 feet, and from zero load to 6 psi pressurization, which is ABOUT A TON (2,000 pounds!) of out-pushing force on this window.
And, from the outside: Simply a perfectly-smooth window in the carbon body!