Tools for flight training
Hi! Randy here, from the X-Plane team. This is the sixth email in the course on getting the most out of X-Plane.
Today I’d like to share with you a few things you can do with X-Plane that are perfect for flight training.
1. Fly with a real-world EFIS
You can use your iPhone or iPad as a 100% realistic flight display. The display is called Xavion, and it’s being used in real cockpits as we speak.
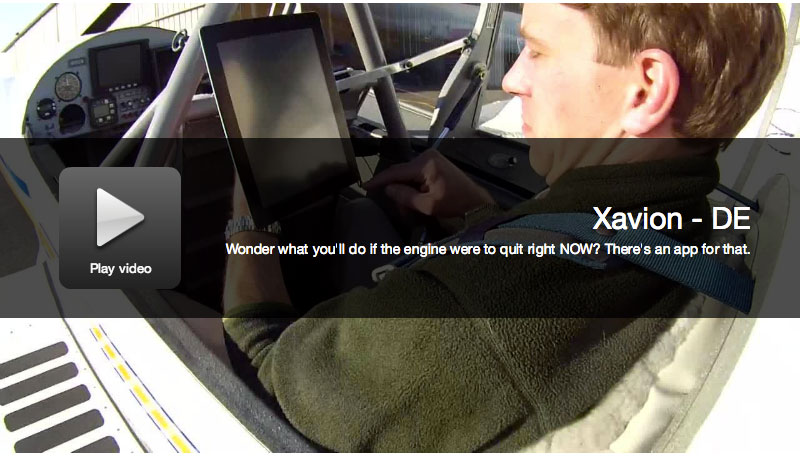
Here’s what Xavion does:
- Serves as a backup to the plane’s primary instruments—airspeed indicator, artificial horizon, and so on
- Provides advanced synthetic vision so you always know exactly what the terrain is like around you
- Provides highway-in-the-sky guidance to your destination
- Estimates your fuel expenditure at various speeds and altitudes, so you can fly as fast or as efficiently as you want
- Provides emergency guidance to the safest nearby airport in an engine-out situation
Download the free demo
Here’s the great news: if you have an iPhone or iPad, you can use Xavion for free with X-Plane. So, first download Xavion and install it on your iPhone or iPad.
Download the free Xavion app for your iPhone or iPad
Once you’ve downloaded it, click here for instructions on setting up Xavion with X-Plane.
Flying in the real world with Xavion
Xavion is not just a great EFIS display for X-Plane—you can use it in a real airplane as
- a synthetic vision system,
- a backup instrument panel,
- a highway-in-the-sky navigation tool,
- a weight-and-balance calculator, and even
- an engine-out emergency landing tool.
Garmin charges thousands of dollars for a synthetic vision system.
No one else even offers an emergency landing planner like this.
Using your iPhone or iPad, you can have the situational awareness and safety from both these features every time you fly. One pilot calls it “the most significant advance in aviation safety since the parachute.”
In order to use Xavion in your real-world cockpit, you can buy the full version of Xavion from the App Store. It’s a fraction of the cost of a Garmin system, and a fraction of the cost of an off-airport landing if you ever have an engine-out.
Download the full version of Xavion for use in a real plane
2. Practice startup procedures
By default, X-Plane starts your aircraft on the runway, with engines running, ready to take off. If you prefer to start your own engines or taxi from an apron (also called a ramp) onto the runway, you can do so by opening the Settings menu and clicking Operations & Warnings. There, in the pane labeled “Startup,” you can un-check the box labeled Start each flight with engines running or check the box labeled Start each flight on ramp.
Note that not all aircraft models have panels built for to simulate a full start-up sequence. The Boeing 747 model in X-Plane 10 is one that does model this accurately. You can watch a video of the 747 startup procedure if you’re interested.
3. Get real-time charts and plates on your iPhone or iPad
Using an app called ForeFlight (available in the App Store), you can get charts and approach plates on your iPhone or iPad. Previously, this tool was only for use when flying in the real world, but now you can also use it in simulated flights in X-Plane.
To do so, you’ll need to have your iPhone/iPad on the same wireless network as the computer you run X-Plane on. For all the details, check out the full writeup in the user manual.
4. Use an Instructor Operator Station with a flight instructor
X-Plane supports the use of an Instructor Operator Station (IOS), a console used by a flight instructor in order to fail systems in the student’s aircraft, change the weather and time of day, or relocate the aircraft. The IOS can be run either on the same computer as the simulator (using a second monitor), or it can be a separate computer which connects to the student’s computer (either on the same network or over the Internet).
For details on setting up an IOS, check out the writeup in the user manual.
5. Fly with a copilot
By connecting two computers running X-Plane together on the same network, you can have two users flying together in the same cockpit. Even better, you can have each pilot see a different half of the instrument panel!
To do so, you’ll need two computers, each running their own copy of X-Plane, connected to the same network. You’ll also need two copies of the aircraft you intend to fly. By modifying that airplane’s instrument panel, you can set up the copilot’s view.
For all the details, see the section of the user manual titled “Setting Up a Copilots Station.”
6. Replay your takeoffs and landings to see how you’re doing

X-Plane offers a couple different ways to visualize the path taken by your aircraft.
See the path traveled by your airplane in 3-D
The path taken by an aircraft up to its current location can always be seen as a trail behind the aircraft when you toggle the 3-D flight path on. To do so, either press Ctrl + p on the keyboard, or move the mouse to the top of the screen, click on the Aircraft menu, and click Cycle 3-D Flight Path. Doing so once will cause X-Plane to display a violet-striped line behind the aircraft. Cycling the flight path again will give a semi-transparent black bar extending from the flight path to the ground (seen in the image above). Cycling it a third time will show a series of boxes in the air representing the glide slope of a runway (Note: the Nav1 radio must be tuned to the proper ILS frequency). Cycling the flight path twice more will add in the violet line and the semi-transparent black bar, respectively, to the glide slope boxes. Cycling the path once more will turn off all flight path lines.
To reset the 3-D flight path, either press Alt + p on the keyboard, or open the Aircraft menu and click Reset 3-D Flight Path. The flight path will also be reset whenever you load an aircraft or a location.
Replay your flight up to this point
You can replay your flight, from the last time you loaded an aircraft or a location up to your current location, by toggling the replay mode on. This can be done either by pressing Alt (option on a Mac) + r or by opening the Aircraft menu and clicking Toggle Replay Mode. In the top of the window, you will see shuttle controls to (listed left to right):
- stop playback,
- play backward faster than real-time,
- play backward at real-time speed,
- play backward slower than real-time,
- pause playback,
- play forward slower than real-time,
- play forward at real-time speed,
- play forward faster than real-time, and
- stop playback.
Additionally, you can click the shuttle slider and drag it to quickly jump around in the playback.
To return to the flight, either press Alt + ‘r’ again or open the Aircraft menu and click Toggle Replay Mode once again.
Wrapping up
I hope you’ve found these tips useful. If you’re successfully training in X-Plane, you’re probably ready to get rid of the time restriction on the demo (and get scenery for the rest of the world!). By ordering X-Plane 10 Global from our web site, you’ll be able to fly as long as you like, without the annoying time limit.
As usual, if you have questions, send me an email at [email protected] and I’ll be happy to help.
Until next time,
– Randy
